UI Description
Main Screen
Permanently available components, all specific to the main screen:
Rail on the left side, containing:
Info button
Settings button, see below
Exit button
New Query button, see below
Top bar, with Sorting controls
List space (empty after install) containing Query cards, see below
Settings
The Settings button opens the General Settings dialog. Settings consist of String: String pairs that are saved in the installation directory as JSON file.
path-to-queries: absolute path of the directory where your queries will be saved and, on start up, read from. Use this to organise if you have a lot of queries, e.g. create a new directory and change this setting to it, so you can archive the old one. Or switch back and forth.
directory-prefix: regarding the single query directories below the above mentioned directory, they get a name consisting of prefix and query name. Install default isQuery-.
path-to-YDF: on Linux, if you want to use a ML classifier, set this to the path of your YDF installation
path-to-classifiers: as per above, the path under which there are ready trained ML classifiers; LitBall ships thevirus-EXPmodel
query-sort-type: permanent sort setting that is changed by clicking on the sorting controls on the main screen
paper-sort-type: permanent sort setting that is changed by clicking on the sorting controls on the two paper list screens
New Query
This button asks you for
the name of the to-be-created query. This should be short, optimally an abbreviation
one or more DOIs of the core papers, with which the first expansion is performed. Please input the part starting with
10.which all DOIs start with
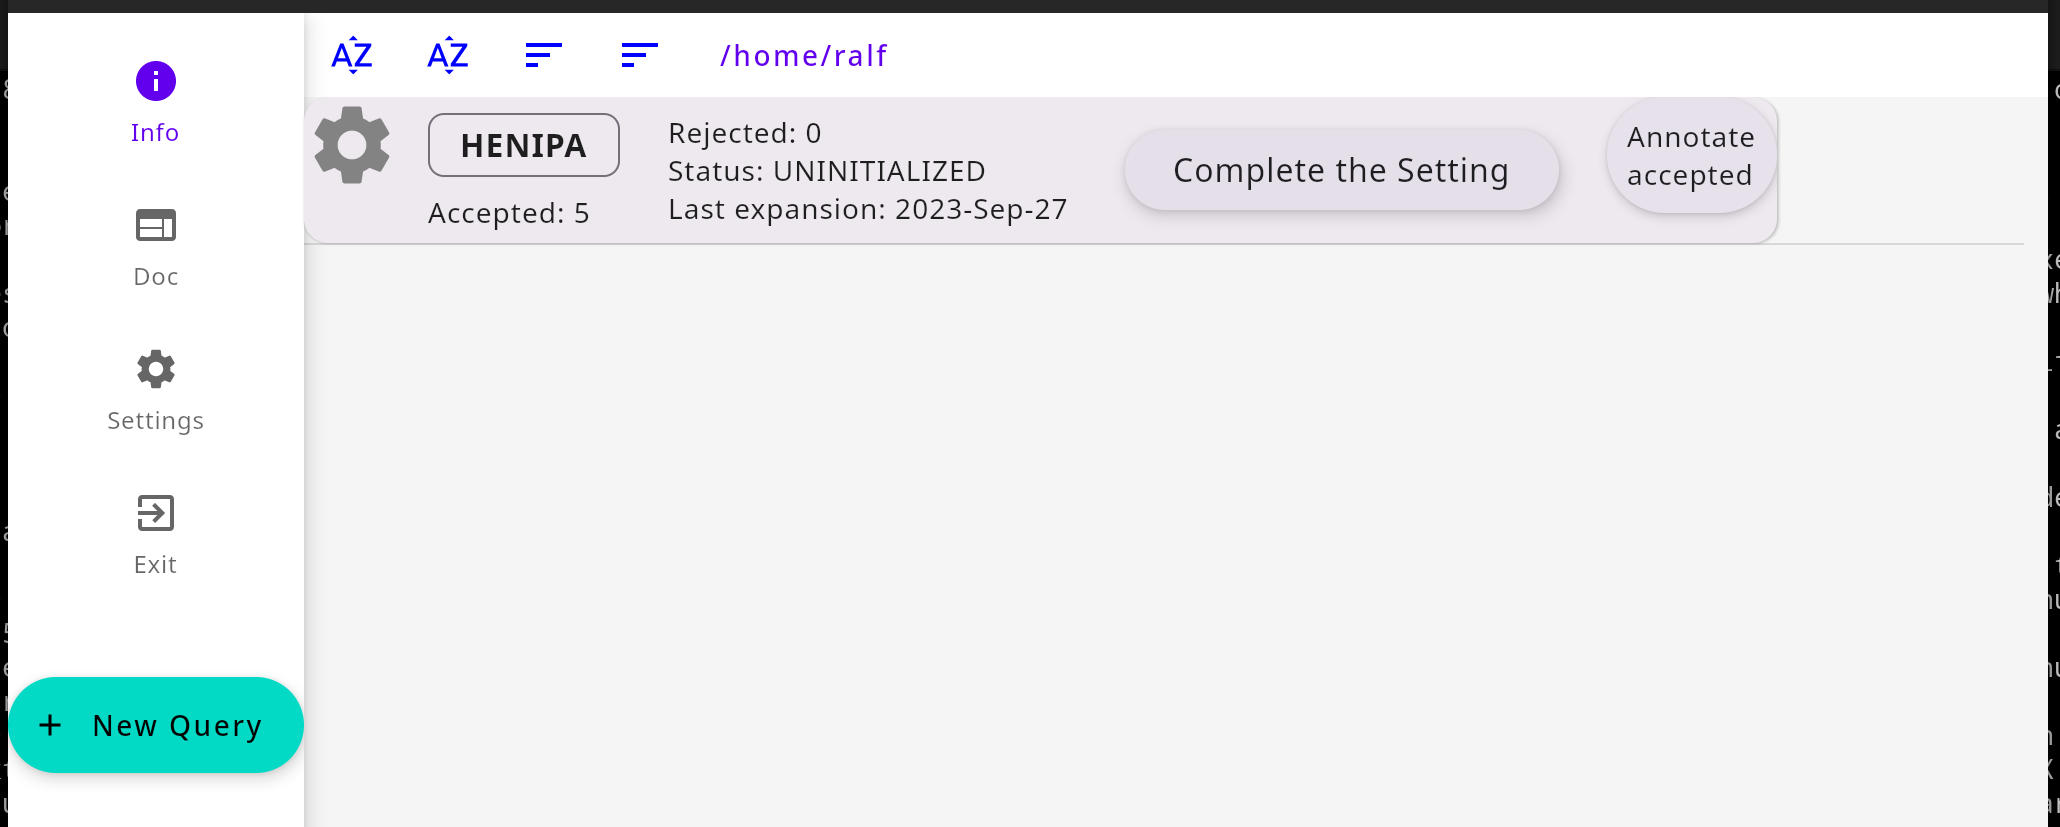
Query cards

Once you complete the set up of a query (see Quick start), query cards are visible in the List space of the main screen. They contain (from left):
a Settings button for specific query settings, see below
the query name, framed and emphasized
the string
Accepted:, indicating the number of papers you chose as core articles, plus all others you accepted later in the Supervised filtering steps. Set in bold if the last round of expansion/filtering didn’t get any new papers that you acceptedthe string
Rejected:, indicating the number of papers that were rejected during both filtering steps, i.e. those rejected because their title/abstract/TLDR didn’t contain one of the mandatory keywords; their title contained one of the forbidden keywords; or they were manually rejected by youthe string
Status:, indicating one of three states the query can be in:EXPANDED,FILTERED1, andFILTERED2the string
Last expansion:, indicating the last time an expansion was performedthe Action button, showing one of three actions:
Start expansion,Automatic filtering, orSupervised filteringthe Annotate button, which leads you to a paper list screen, showing details of all accepted papers, and where you can put these articles into further categories, and export them
Query Settings
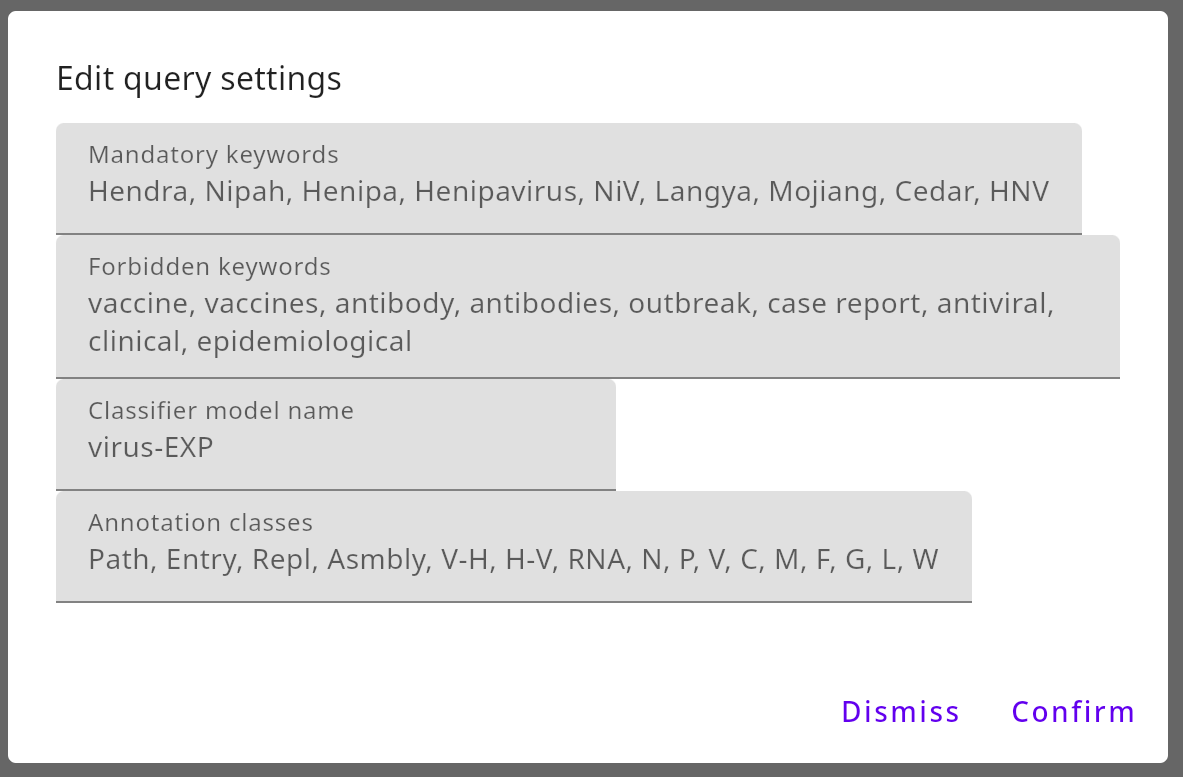
- In the query-specific settings dialog, the following can be set:
Mandatory keywords. In the automatic filtering step, words from title/abstract/TLDR of articles are matched against these keywords. You must set at least one keyword before expansion
(optional) Forbidden keywords. If the article title contains one of these, the paper gets rejected during automatic filtering
(optional) Classifier model name. If set, the Apply Classifier button becomes available during Supervised filtering
(optional) Annotation classes. Comma-separated names of classes that can be set for each paper in the annotation screen, affecting the export of data
Supervised Filtering Screen
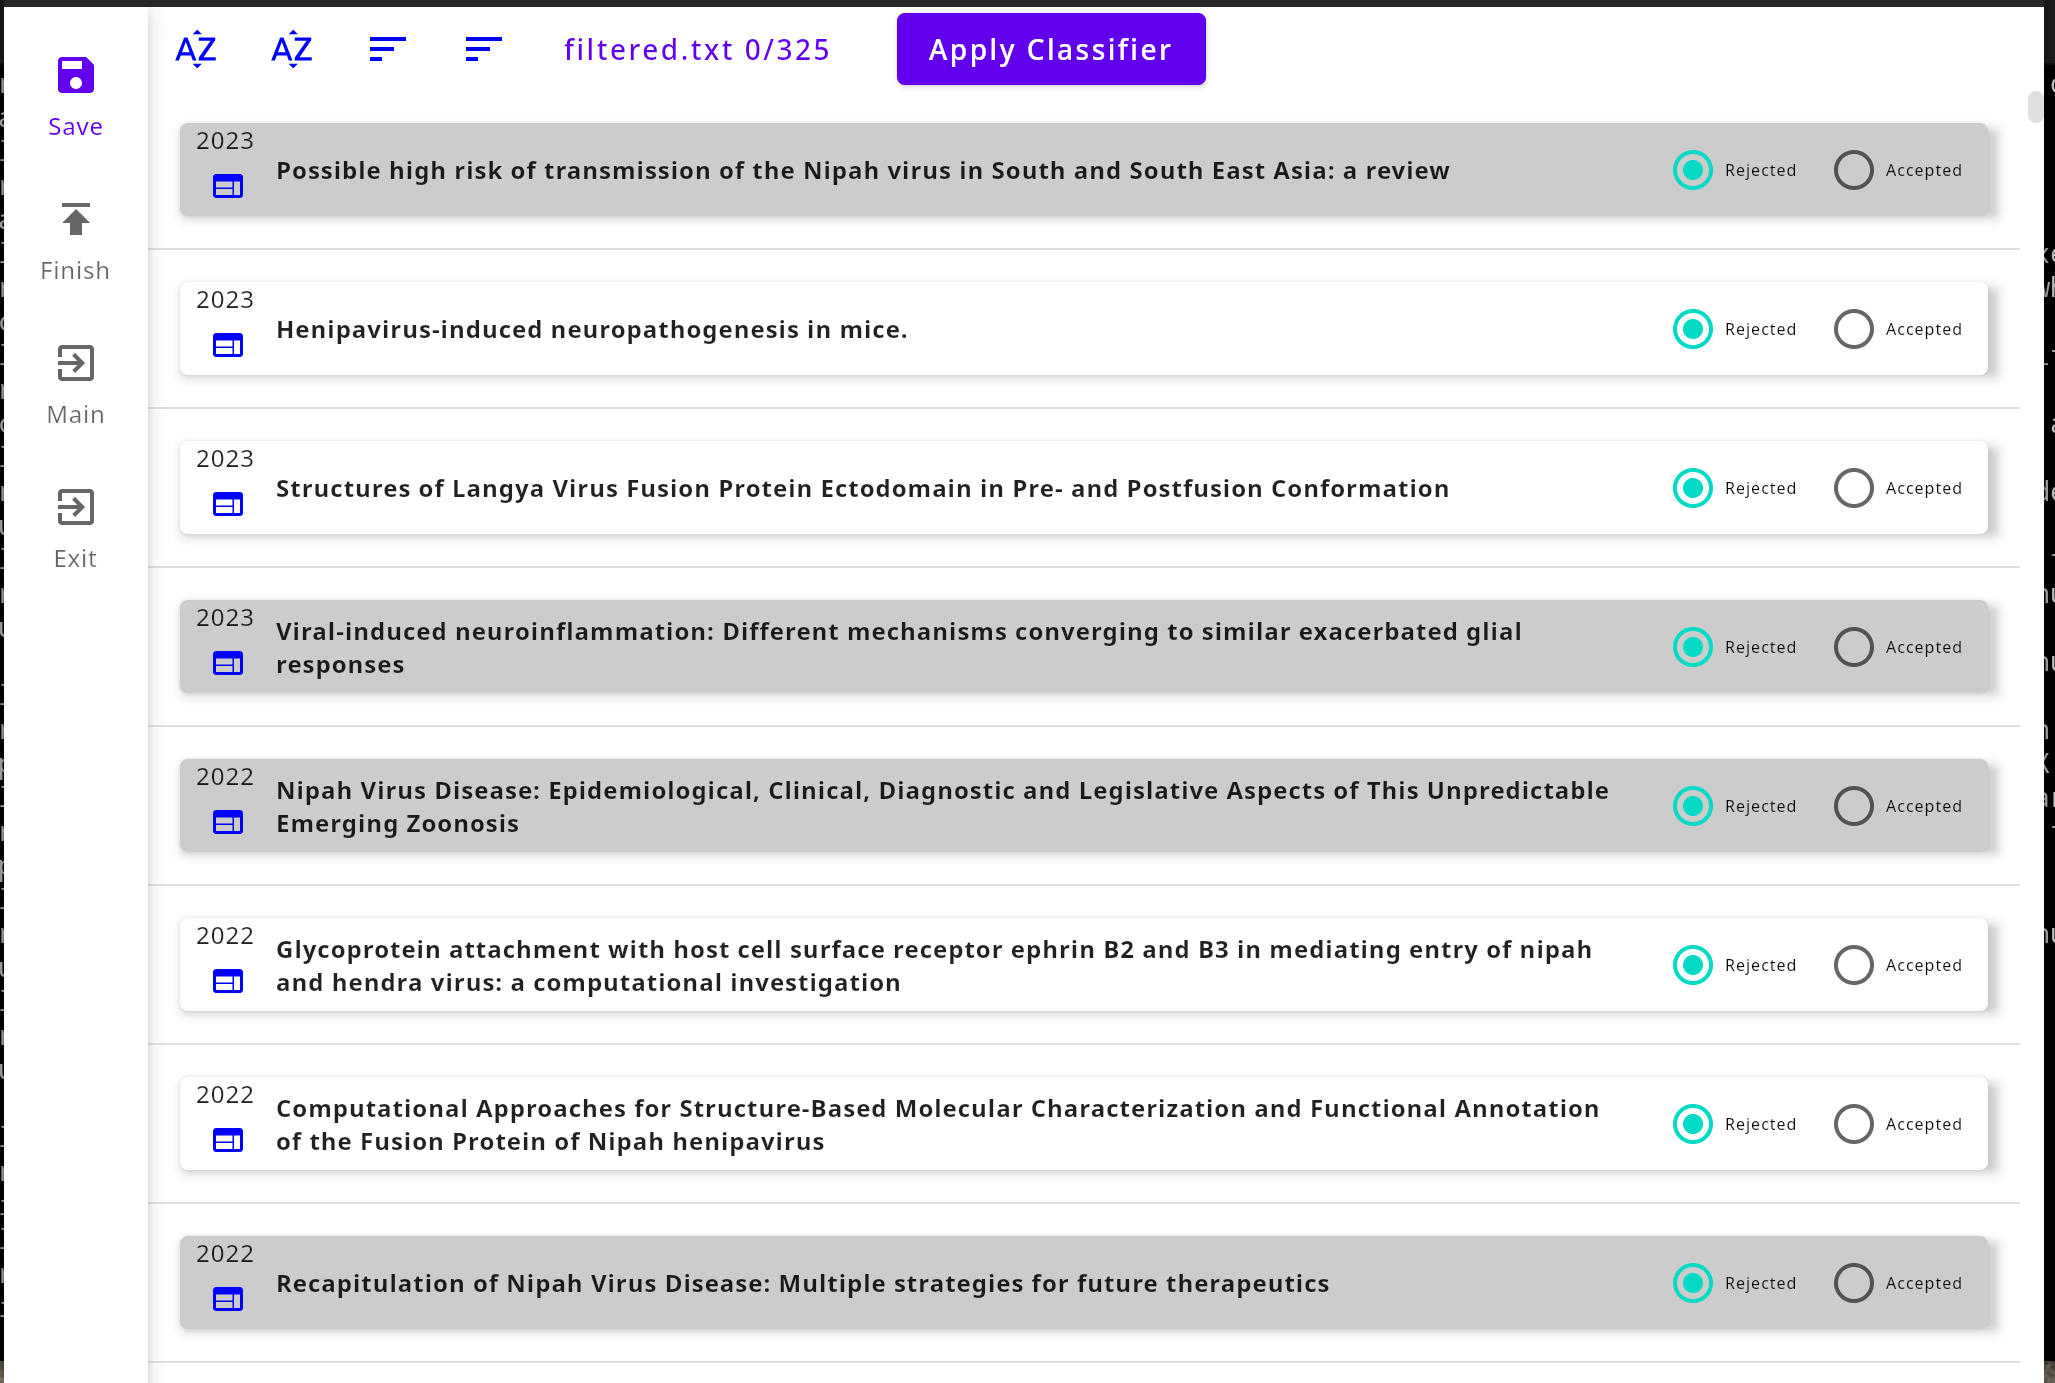
- This screen shows
a Rail containing
Save Button. Saves current list with Rejected/Accepted settings in query directory
Finish Button. Finalizes the supervised filtering step. Rejected papers will no longer be considered
Main Button. Saves and returns to main screen. You come back by clicking
Supervised filteringagainExit button
Top bar, with Sorting controls
List space showing titles of all papers that need decision whether to accept them; use the radio buttons to the right. Clicking on the title opens a dialog showing details. On the left of the title, the web page symbol opens in your browser the PubMed or Google Scholar search results for this title.
Annotating Screen
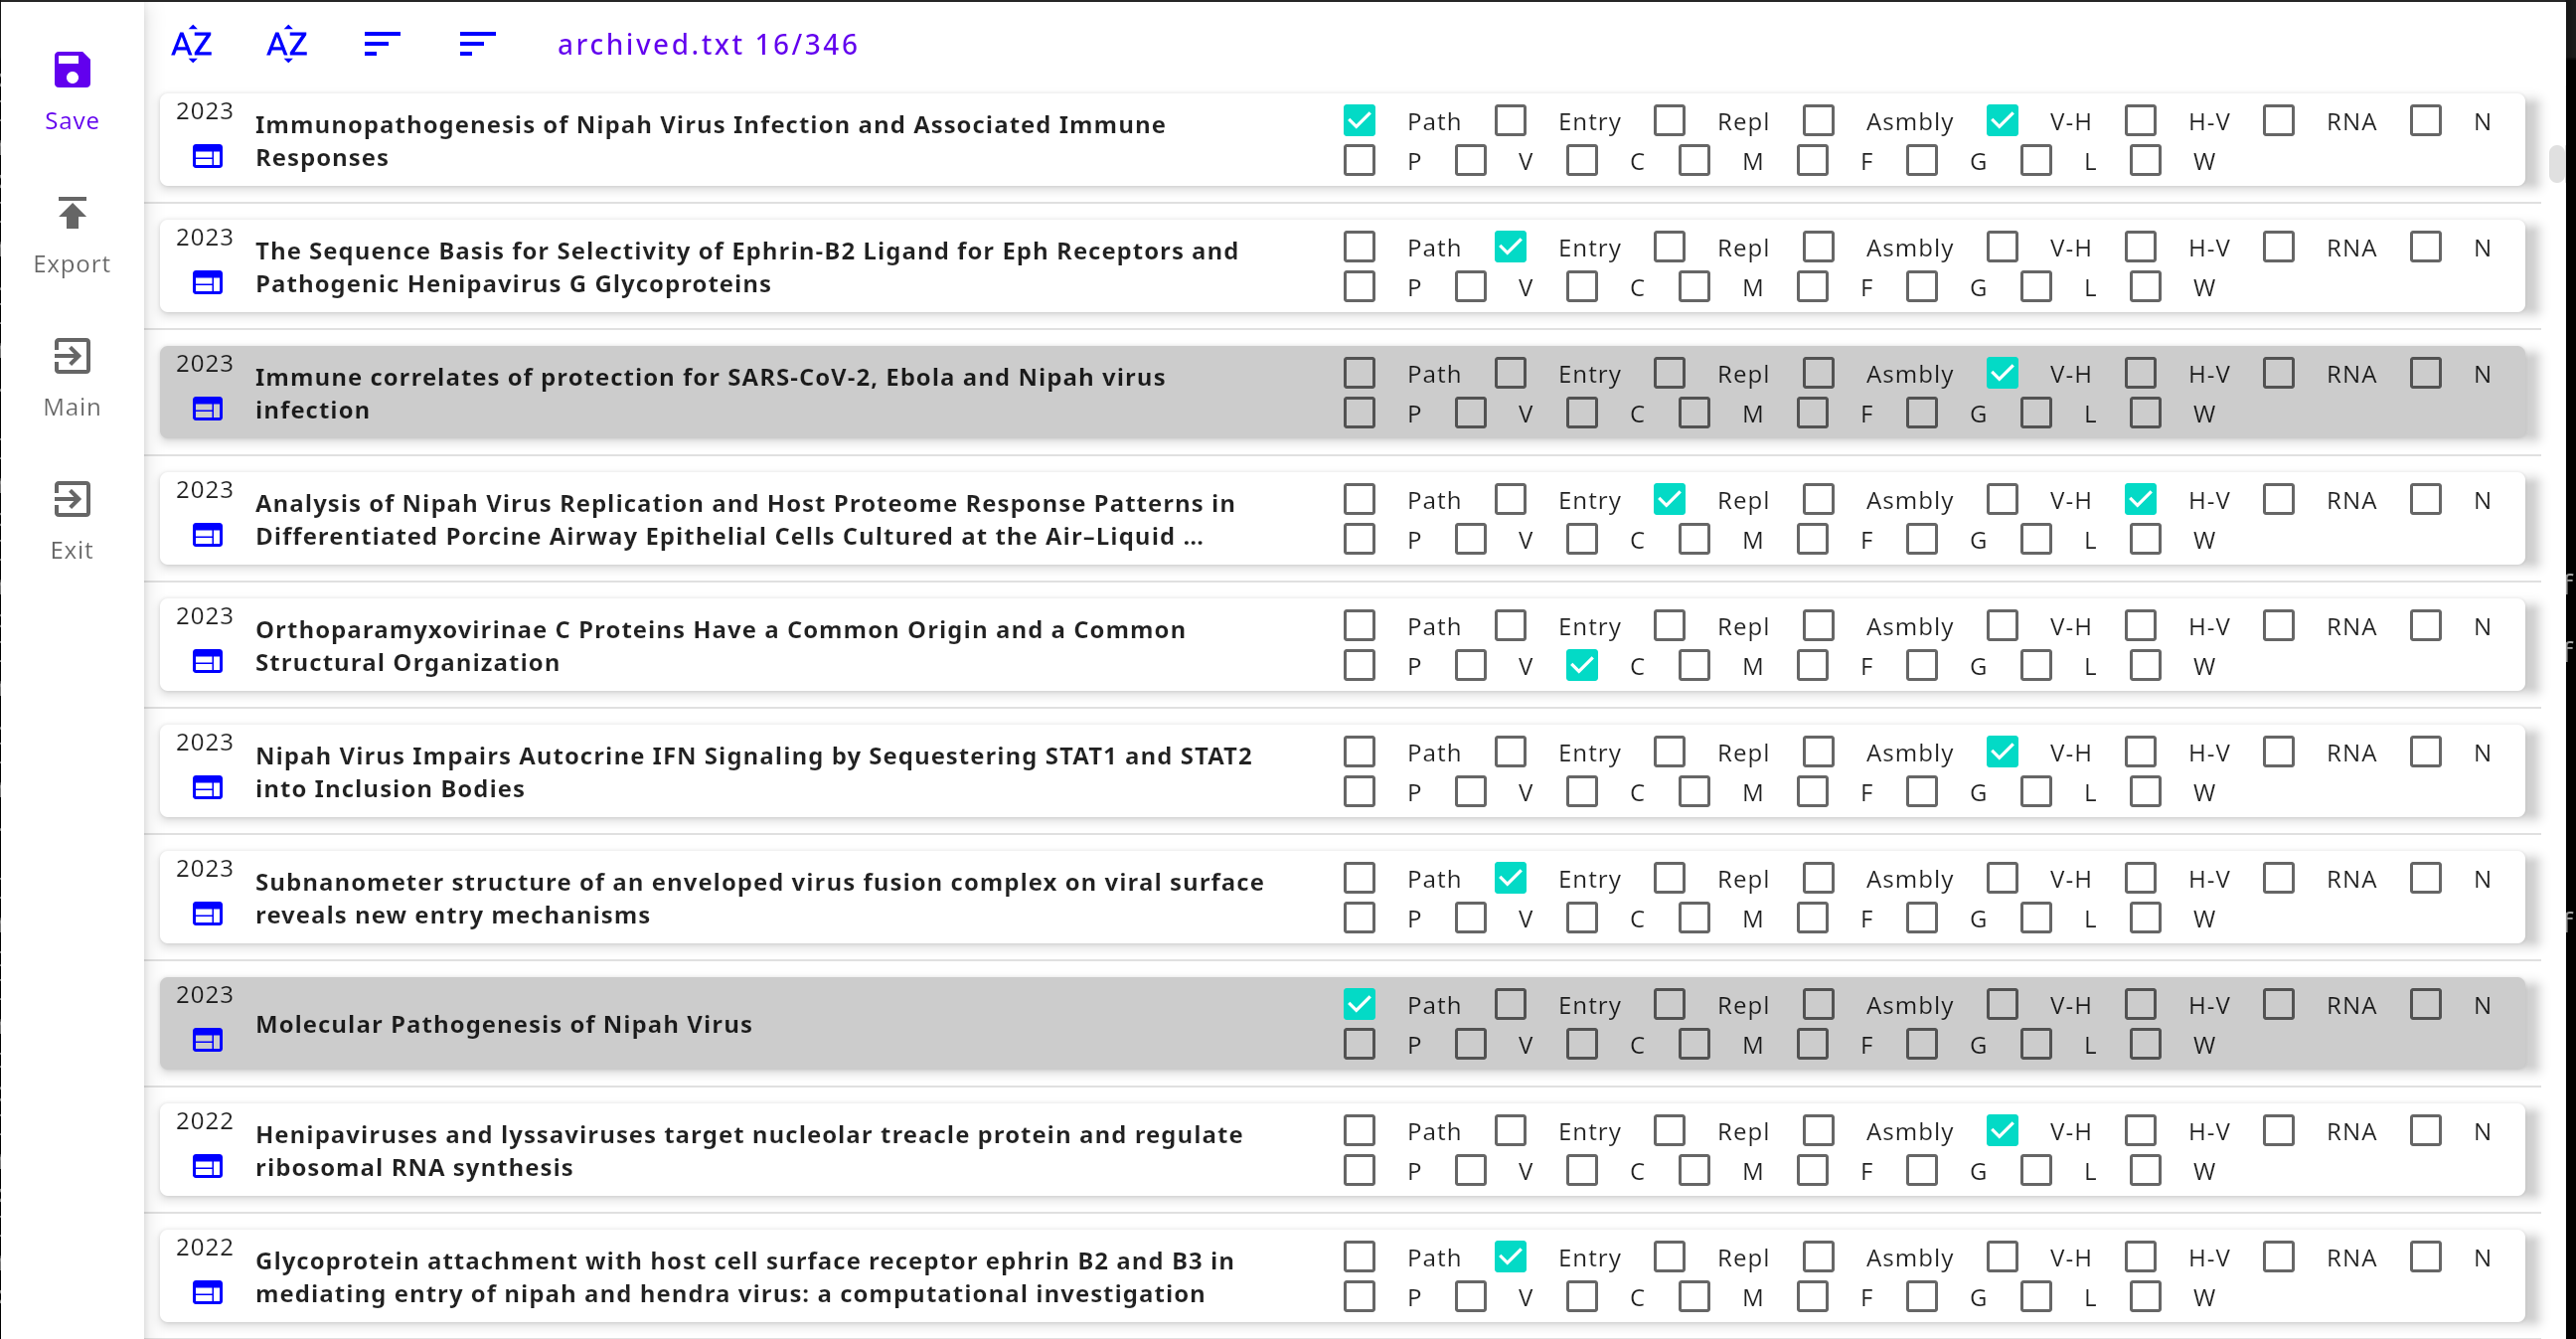
- This screen shows
a Rail containing
Save Button. Saves current list with Annotated settings in query directory
Export Button. Writes CSV into query directory
Main Button. Saves and returns to main screen. You come back by clicking
Annotate acceptedagainExit button
Top bar, with Sorting controls
List space showing titles of all papers that optionally need association with categories; after setting annotation classes in query settings, use the flag boxes to the right. Clicking on the title opens a dialog showing details. On the left of the title, the web page symbol opens in your browser the Google Scholar search results for this title.